| SimVimX | HARDWARE | CONFIG TOOL | TECH TIPS | | SimVimPanel | CONVERSIONS | B58/SIM

menu System description, plugin/firmware download

Main Configuration and Conversion Tool.

Download conversions for custom aircraft models (completed or in the process of conversion files).

menu

The SimVimX System is a flexible, powerful and easy-to-use Input/Output interface for home cockpit builders that makes it easy to create your own cockpit without spending a lot of money or time since no programming or electronics skills are required.

Only cheap, mainly ready to use electronics modules are used without need to order or make any complex PCBs. It is not necessary to know X-Plane's data structure and scripts, only a basic understanding of datarefs can be useful for custom conversion.


SimVimX System Components

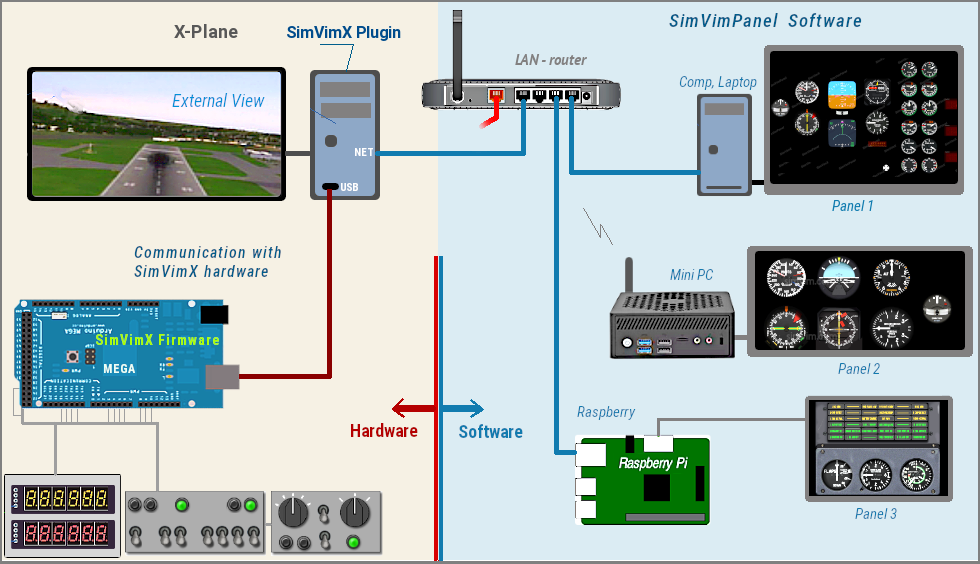
1) SimVimX Plugin for X-Plane is the most essential part of the system. It provides data processing for output, receives data from the master controller board and communicates with the panel simulator (SimVimPanel program).

2) Firmware for Atmega 2560 controller is a highly optimized program code, written from scratch, without using Arduino libraries, to handle a huge number of inputs and different output devices, data exchange between the SimVimX plugin and the slave controller boards.

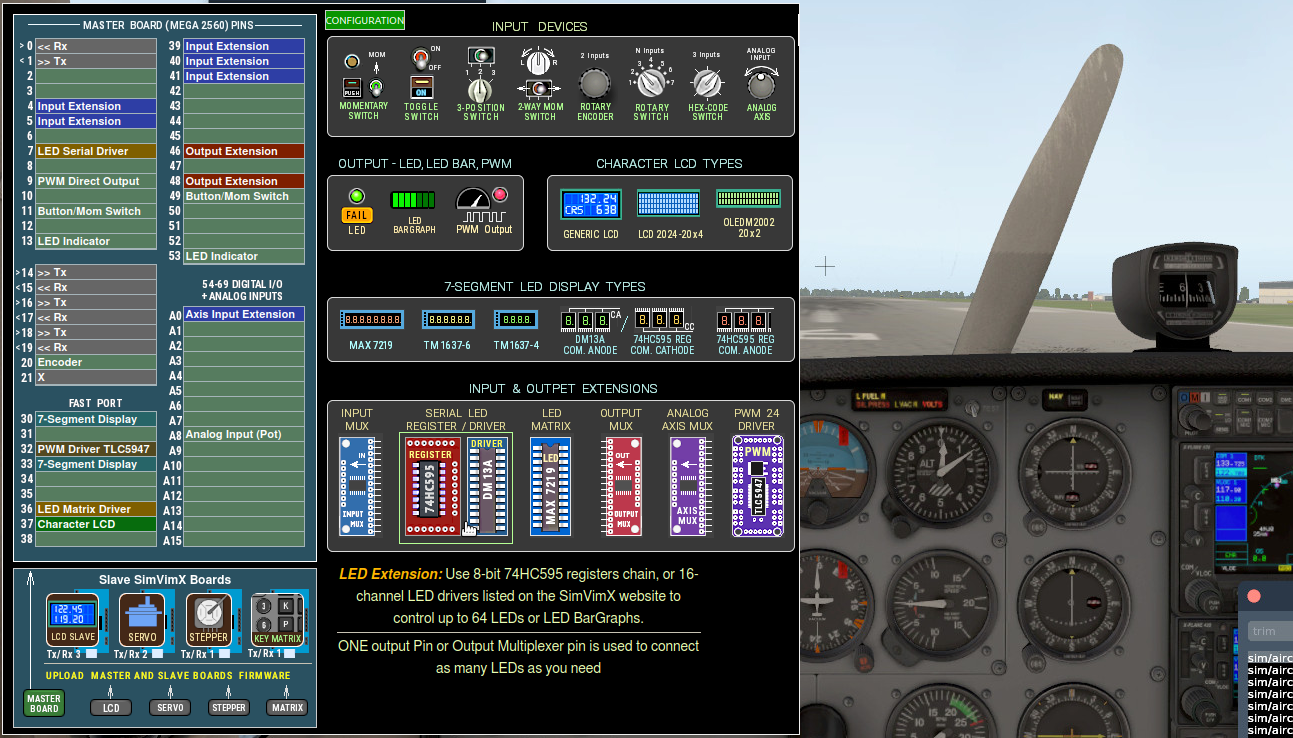
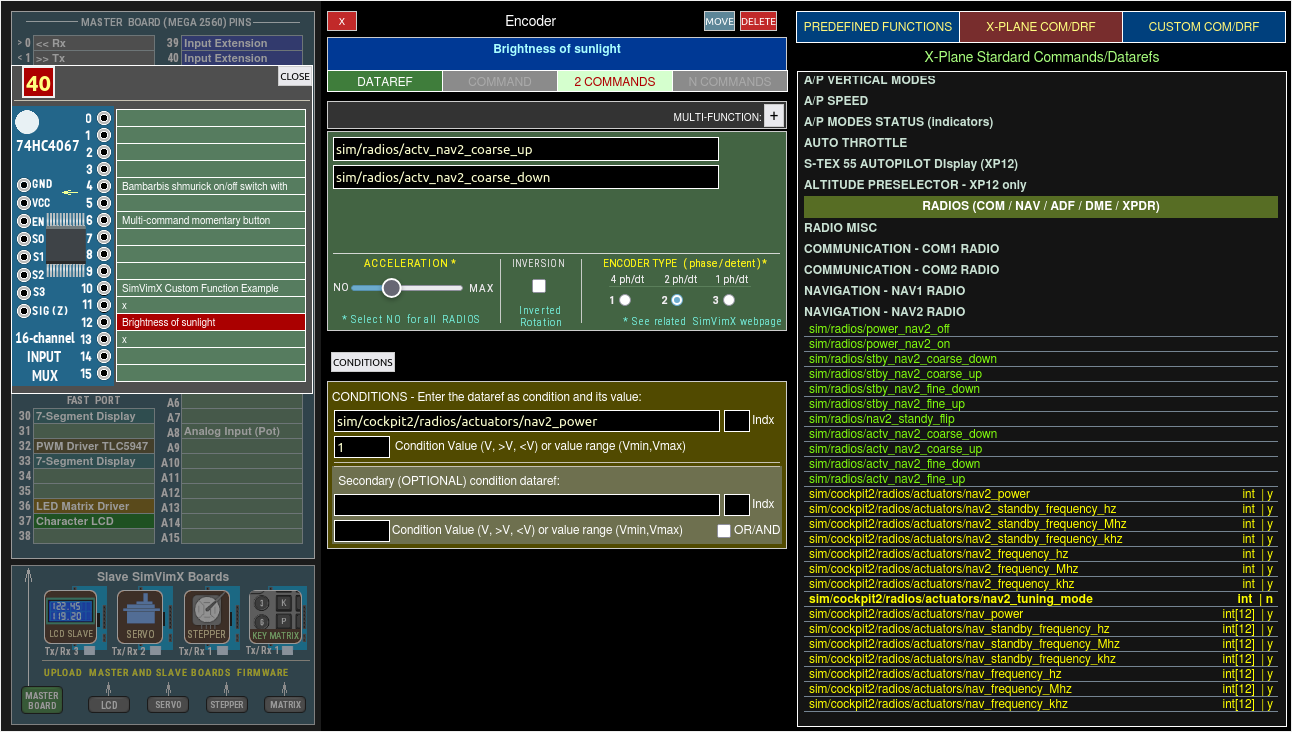
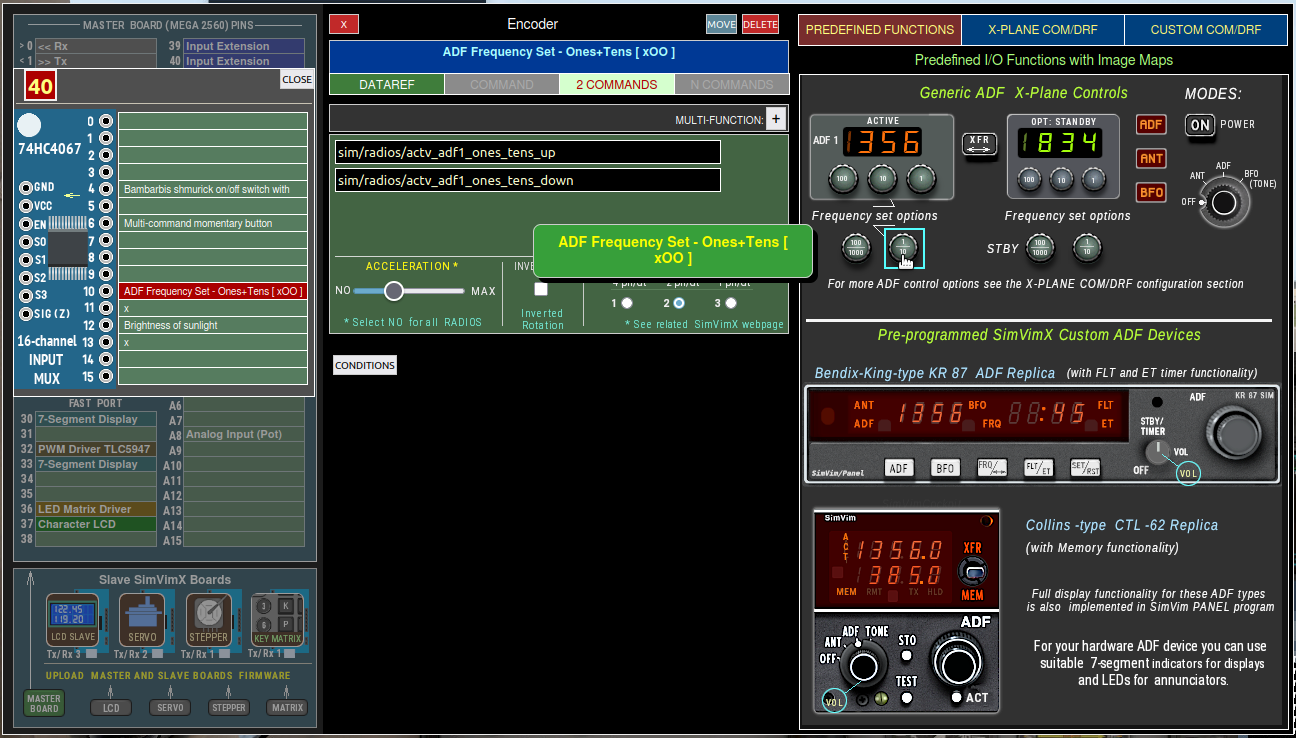
3) The Interactive Configuration Tool is a handy online I/O Configurator used to configure cockpit control hardware for any aircraft. Image maps of different panel areas and whole panels make it easier to find and assign all the needed elements to the switches, encoders, LEDs, displays and gauges.

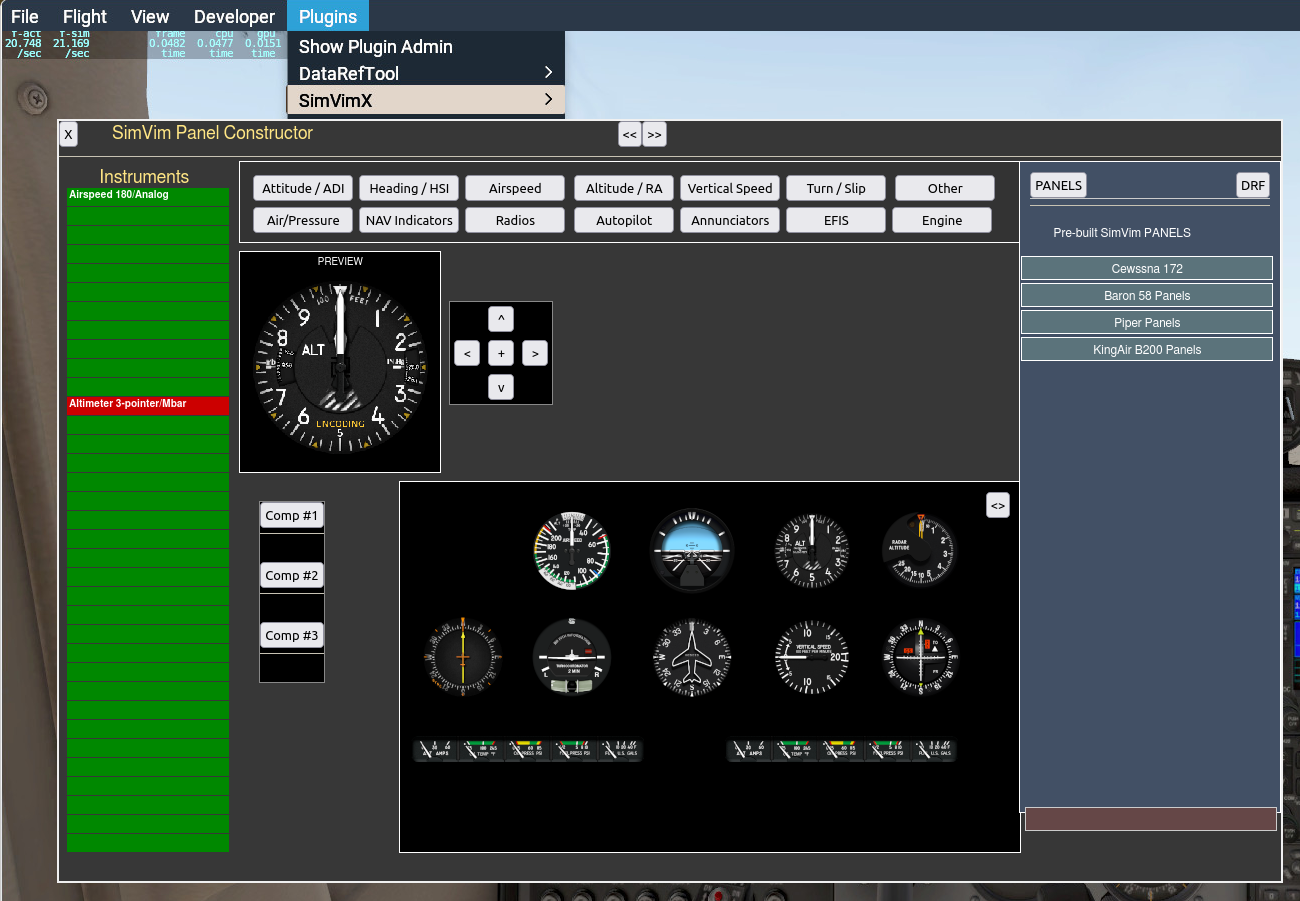
4) SimVimPanel Software is a standalone program with a set of realistic, fully-functional aircraft instruments to be displayed on a computer that is connected by network to the main computer with X-Plane. The system is built in such a way that any number of computers with different instrument panels can be connected to the main computer running X-Plane. The program doesn't require any configuration on the user's part. Once you download SimVimX plugin for X-Plane and run the program on another computer in the local network, they will connect automatically.

simvim

The SimVimX project is always in a state of constant development and its functionality can be improved and changed during development.
It is currently freeware, but ultimately it can become free open source at a certain stage of development.

System Architecture

The SimVimX interface is a bus-based system for a widely dispersed work area (such as the home cockpit). The central control unit of the SimVimX System is a single "master" controller board Mega2560 (Arduino2560) with SimVimX firmware uploaded to it only once (until next firmware update).


  1. All toggle, momentary, rotary switches and encoders are connected to the system using simple input extension boards (multiplexers), totally up to 500-600 digital inputs can be configured (depending on how many pins you reserve for output devices). Also, direct connection can be used for simple cockpits.
  2. Up to ~1000 LEDs can be connected using the output extensions - LED drivers, up to 64 LED for each extension. Also, direct connection can be used for few LEDs in simple cockpits.
  3. Up to 64 seven-segment displays (or displays plus LED drivers) can be connected to the system, using output multiplexers. A few indicators can be connected directly to the master board.
  4. Additional "slave" controller boards (Arduino Nano/Uno) are used: for servos (up to 32), stepper motors (8-19 motors now), LCD displays (12 LCDs) and key matrix inputs (+176 buttons). More slave boards can be added in future.
  5. with
  6. Also, character LCDs can be used with "direct" connection, in case if you don't want to use the slave LCD board and have many free pins, or 12 LCD on the slave board is not enough.
  7. You can connect up to 24 PWM-driven moving-coil gauges or other PWM controlled devices or LEDs using one TLC5947 PWM driver or connect up to 15 directly to the master board if you have free pins not assigned to inputs/outpus.

All pins that are available in the CONFIGURATOR can be assigned for inputs/outputs or extensions

sys sys

Functions of the control/address bus pins:

  • Pins #22,23,24,25 are used as four address lines (S0, S1, S2, S3) for all multiplexer boards and directly connected LCDs.
  • #26 - "S (SIG)" Output port for OUTPUT extension boards only
  • #27 - "L" - Control signal for 7-segment displays (except TM1637), Serial LEDs, PWM board
  • #28 - "D" - Data signal for 7-segment displays (except TM1637), Serial LEDs, PWM bpard and LCD displays.
  • #29 - "T" - Control signal for TM1637 7-segment displays only
  • The pin pairs #14,15 / #16,17 / #18,19 can be used for serial communication with slave driver boards (steppers, servo, LCD, matrix).

NOTE: The +5V output pin can be used as a source for all multiplexers connected to the system bus. Also it can be used to power few low-current output devices. See more detail about system powering here.


You can create a flexible modular system and have full set of input controls for any complex cockpit and easily expand it by adding more extension modules at any time.

Alternative controller boards

You can use any of the Mega 2560 based controller boards available on the market. In the photo you can see three mini controller boards that are tested with SimVimX, the firmware was uploaded to every of these boards from SimVimX plugin menu without any problems.

with sys sys sys sys sys

There are some other atmega2560 controller boards on the market like "Crumbuino-Mega", various "core" modules. You can find them yourself using such keywords as "2560 core", "atmega2560 mini", etc.

The SimVimX Plugin for X-Plane is the most essential part of the system. Since this project launch, the plugin has grown into a huge program, which is not just an I/O interface that simply executes some X-Plane commands, but a "cockpit simulator" with complex custom functions for number of input/output systems.


  • The plugin provides a communication protocol with the firmware program loaded into the master board (Mega 2560). The plugin receives input data from the controller, using it to run SimVimX functions to simulate specific device logic, or directly call X-Plane functions. To output data, the plugin reads and processes the simulator data configured in the user config file and sends the results to the controller in a specific format based on the output and device type and conditions.
  • The same protocol is used to communicate with SimVimPanel program to display instrument panels on other computers. The plugin processes simulator data and sends the results to the panel program to display all instuments readings. It also receives input data from the on-screen SimVimPanel input zones to call X-Plane functions or SimVimX functions to simulate instruments logic:
  • The plugin contains about 350 different custom programmed functions that expand upon the data and functions available in X-Plane, for purposes such as simulating advanced functionality of equipment based on its type, implementing cockpit controls not available in X-Plane or used only in specific aircraft types, doing additional processing of X-Plane data to make it more suitable for multi-purpose output, and so on.

Getting started is easy

If you have a spare Arduino Mega, you can quickly test how the plugin works with the hardware controller by uploading the SimVimX Firmware to it. The firmware is already included in the plugin, so just open the plugin's "I/O Hardware" menu and follow the steps described here.


Plugin Installation:

Add the SimVimX plugin to your X-Plane as any other plugin. Just extract the SimVimX zip file as-is to X-Plane's "Resources/plugins" folder. The new menu item “SimVimX” will appear in X-Plane's Plugins menu. Supported systems: Linux, Windows, OSX. The status window shows the connected SimVimPanel instrument modules and connection status (you have to select to show the Status window):

instinst

Download - (please always use the latest versions to avoid problems with your working configuration).

The latest database file (SimVimX.dat) is always included in the plugin archive, but note that it can be updated frequently, even if the main SimVimX plugin has not been updated to a new version. Always replace older SimVimX.dat file in the plugin folder with the latest one. It includes all predefined parameters, the "embedded" conversion data for some planes, name auto-correction list (to replace old parameter names with new ones), etc.


Current SimVimX version (Plugin and database file), all systems SimVimX Plugin - v2.22 23 Oct. 2024
Latest database file (can be included in the plugin archive above) SimVimX.dat 23 Oct, 2024
Experimental plugin for Apple Silicon (aarch64-macos) SimVimX Plugin - aarch64-macos beta
>> Latest changes, description Full Versions History

SimVimX Firmware

The SimVimX firmware is a heavily optimized program code, written from scratch (without using third-party Arduino libraries) to handle a large number of inputs, synchronize data control for a large number of different input/output devices, exchange data between plugin and “slave” boards. The firmware includes functions fo massive inputs and it also is a kind of universal "driver" for all output devices.

Note: SimVimX System doesn't allow to use the controller board as a "usual" Arduino and users can not add any custom code, as there is no Arduino sketch, and the plugin uploads firmware directly to the board. At this moment the Atmega2560 is used as a convenient and easily available controller platform for SimVimX.


The firmware is designed to work only with SimVimX plugin. The latest stable firmware is usually included in the plugin.

The SimVimX Firmware needs to be uploaded only once, directly from the SimVimX plugin menu at the first time.
Then the firmware will be automatically uploaded to the board by the plugin when the next firmware version released.

You can see the firmware version on every connected LCD after the config initialization in the second line.

>> Latest changes, description

Fresh (first time) Firmware upload

instinst

First time Firmware Upload


  1. Open the "I/O Hardware" window from SimVimX plugin menu.
  2. Make sure the master board (Mega2560) is not connected to USB and click the "[Continue] button.
  3. Plug the master board (Mega2560) USB cable into X-Plane computer USB port.
  4. Click the button >> "Master" in the Firmware Upload section on the left. The [Upload] button will appear in the window.
  5. When you see "Controller Board Connected" click "UPLOAD" . Wait until firmware upload is complete (about 3-5 s).

    If you need to upload the Ethernet firmware version set the "Ethernet" checkbox before pressing "Upload".

  6. After upload the plugin will connect to this controller automatically.

instinst

On successful connection you will see the messages "Master Board: Connected (USB/LAN)" and "Configured: 1 Input, 1 Output"
This means your board is working correctly, and you can start wiring all input controls and output devices to the controller and use the Configuration tool to assign all of them, but before you can run a simple test to make sure:

  • Load some standard X-Plane aircraft (Cessna or Baron 58). Connect a toggle switch to pin #5 / GND and flip it on/off.
  • The on-screen Pitot switch will change its position accordingly with your real switch. The on-board LED on the master board will change its state (Pitot Heat is on/off).

Connection, notes

  • If you have changed the configuration "data.cfg" file while X-Plane is running, just click the "Reload Config" button in the Status window.
  • The plugin should always establish connection automatically every time X-Plane is started, no matter how many times you have done it.
  • Note for Linux users: Some Linux distributions do not grant the user access to serial ports by default. In this case you need to add your user name to the "dialout" group.

Firmware Auto-Update

The plugin checks the currently used firmware version on connection, and if it needs updating (the new stable firmwre is included to the plugin or plugin finds a beta SimVimX file in the plugin folder), the program uploads the new firmware to the board and then establishes connection. There's nothing more for you to do for the serial USB version.

  • For Ethernet version you need to connect your master board to USB (or reconnect it) and click "Upload" - just like during the first upload.


The project arose as a result of the need for a user-friendly I/O interface (which was difficult to find on the Internet at the time) after first success with my Baron-58 panel (2012) program code.

SimVimX is the last generation of our I/O interface since 2012, among ArdSim/X, ArdRef, XPData developed before.
Here is the full history:

! While using the SimVimX system can greatly simplify the process of creating a home flight simulator, you should have some handicraft, basic wiring and soldering skills and sufficient technical knowledge in an aviation related field. Basic knowledge of electronics can be useful (but not required).
It is not necessary to know X-Plane's data structure and scripts, only a basic understanding of commands and datarefs can be useful for custom data conversion.

Before building a home cockpit (especially if this is your first project), you need to realise that it can be a complex and time-consuming process. Please first carefully study the pages of this site (all information is presented in a fairly understandable form).

The over-commercialization of the home cockpit building hobby over the past decade has resulted in a number of overpriced cockpit parts being introduced into the market that can be simply cheap boxes or bezels with a few buttons and a couple of cheap common components (such as GPS, G1000, etc.), but are often presented as complex devices for home cabins due to the lack of available information, that builders may have to easily make the same "complex" devices themselves.

Any enthusiast with the desire to create a home cockpit simulator has an opportunity to get all needed technical information, and know that instead of purchasing expensive hardware, they can build a panel themselves, spending a few hours and using very cheap or free materials and free software.

Of course, there are plenty of reasonably priced cockpit parts and handy “do-it-yourself kits” on the market for home cockpit builders, as well as learning resources, 3D printed parts, free 3D models, etc.

Notes For Home Cockpit Builders:

The SimVimX System is very easy to use with your DIY cockpit hardware. You can easily create or change the configuration for your cockpit of any complexity. The firmware is updated automatically after the initial upload from the plugin menu. You don't need to buy something special, all you need is common switches, buttons, LEDs, display modules and one controller board. And few plastics (PVC), wood, cardboard and your hands. Read "To buy or make?" here.

If you are going to buy some panels, modules, devices to implement them in your cockpit and use with SimVimX interface only, note that all you need is that they have the necessary switches, LEDs, displays to which you have free access to connect (solder) wires, without built-in Mega2560 board inside this device.


! We do not provide support for any commercial cockpit hardware that you could buy somewhere as a module for SimVimX interface.
We are not responsible for any problems that you may encounter, or once this device stops working after next SimVimX firmware automatic update or with newer SimVimX plugin.


Notes For Hardware Sellers:

If you produce and sell hardware for home cockpit builders and you would like it to be used with the SimVimX, please consider the following:

  • Design your device so that all wires from switches, encoders, displays, and multiplexers are accessible or connected to the terminal blocks (headers) of your device chassis. This way, users can easily wire them into an external SimVimX master board (or multiplexers) and make custom configuration along with all the other hundreds of cockpit I/O controls.
  • Don't integrate the controller board (Arduino) into your device if it intended to be used with SimVimX interface only, just describe that your product can be used with SimVimX System and place a direct link to these website pages and online config tool. You have an opportunity to produce cheap, convenient bezels, kits and DIY-modules with all knobs and switches in their places, but without the need to include any complex electronics inside your products!

- It is forbidden to use software in any commercial products, to embed SimVimX firmware (or older ArdSimX) to any commercial hardware and use it as a part of commercial panels and modules. It's not allowed to distribute your products with any SimVim, SimVimX, SimVimPanel software or keep any of our files on other web resources and include them in the package of any products you sell.
SimVimX/SimVimPanel software can be freely downloaded from this website only.


This project is in a constant development, the hardware design can be improved and extended, the communication protocol can be changed frequently. The firmware has changed significantly from version to version several times to comply the SimVim(X) plugin protocol, and further changes may be made to the protocol and configuration.


For the purposes of children education and creativity in some non-profit institutions, museums, or schools (NO MILITARY purpose!), you can contact us and we will concider a way to provide a version for you.


Vlad.
Support the project by subscribing to our Patreon

dwn dwn dwn
RealSimControl / SimVim / SimVimX 2012 - 2023